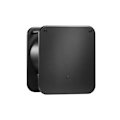
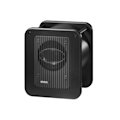
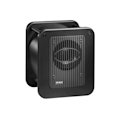
Für alle, die einen kompakten Subwoofer mit erweiterter Tiefbass-Leistung, guten Schalldruck-Reserven und professionellem Bassmanagement suchen, ist der 7050C die erste Wahl.
7050C
Studio Subwoofer

Aktive Frequenzweichen

Bass Management

SPL
103 dB

Frequenzgang
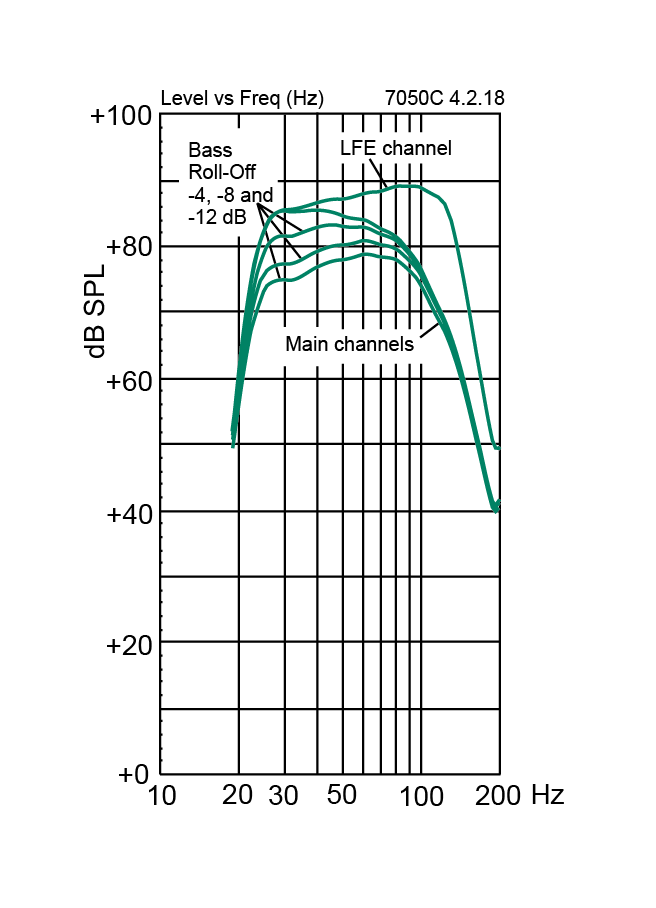
24 Hz - 85 Hz (-6 dB)

Abmessungen
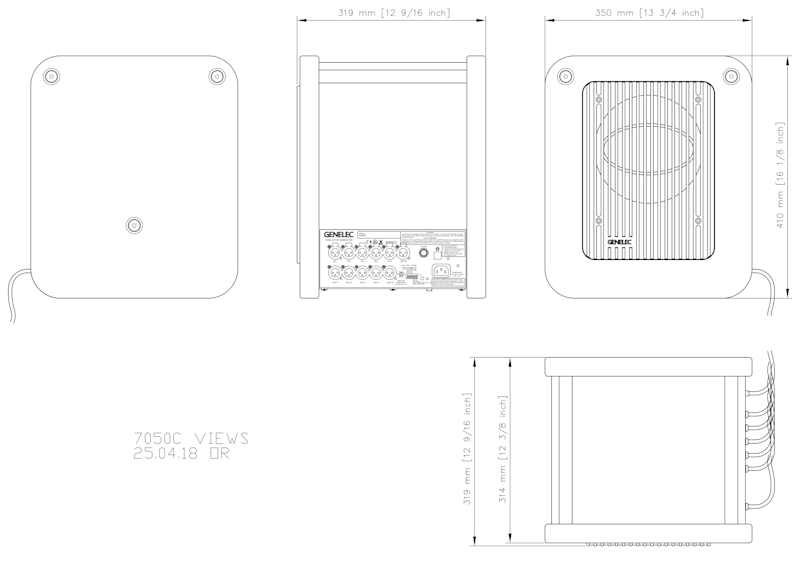
H 410 x W 350 x D 319 mm, (Anzeige in Inch)

Perfekte Partner
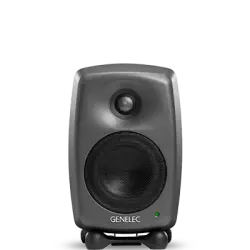
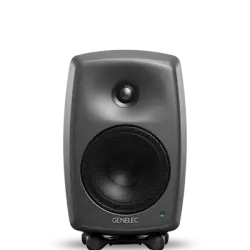
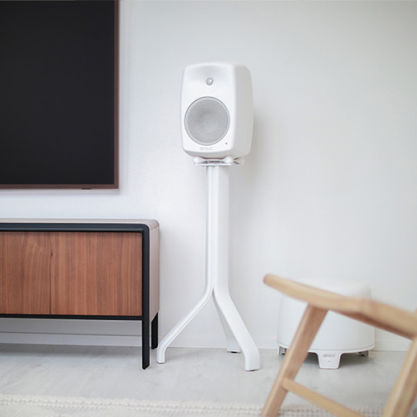
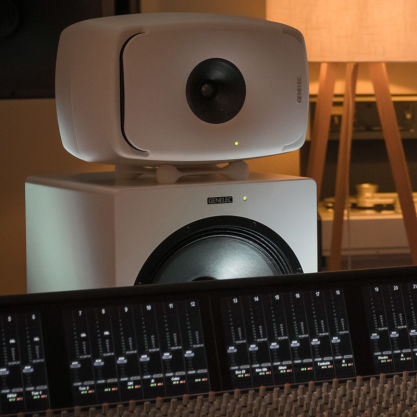
Der 7050C ist der perfekte Partner für alle Nahfeldmonitore, insbesondere für unsere eigenen Modelle 8010, 8020 und 8030. Er bietet eine Reihe von Verbesserungen gegenüber seinen A- und B-Vorgängern, darunter integriertes Bassmanagement, geringere Verzerrungen, ein universelles Schaltnetzteil und einen höheren maximalen Schalldruckpegel von 103 dB.

Stereo oder Mehrkanal
Mit fünf Eingangs- und Ausgangskanälen mit 85-Hz-Filterung plus einem 120-Hz-LFE-Eingang ist der 7050C für Stereo- oder Mehrkanalbetrieb gleichermaßen geeignet. Sein Laminar Spiral-Gehäuse bietet eine erweiterte Tiefton-Wiedergabe bis hinunter zu 24 Hz mit beeindruckend geringen Verzerrungen. Mit den DIP-Schaltern auf der Rückseite lassen sich die Phase des Subwoofers und der LF-Roll-off steuern, die +10 dB LFE-Pegelanhebung aktivieren und die Empfindlichkeit des ISS-Stromsparmodus des 7050C einstellen.

SPL
103 dB

Verstärkerleistung
130 W Bass (Class D)

Frequenzgang
24 Hz - 85 Hz ("-6 dB")

Treiberabmessungen
⌀ 205 mm Bass (Anzeige in Inch)

Abmessungen
H 410 x W 350 x D 319 mm, (Anzeige in Inch)

Gewicht
17.3 kg / 38.1 lb

Anschlüsse
6 x XLR Analog Input
5 x XLR Analog Output
7050C Studio Subwoofer
Studio Subwoofer
Technische Spezifikationen
Für alle, die einen kompakten Subwoofer mit erweiterter Tiefbass-Leistung, guten Schalldruck-Reserven und professionellem Bassmanagement suchen, ist der 7050C die erste Wahl.

Systemspezifikationen
Frequenzgang
Low cutoff -6dB
24 Hz
High cutoff -6dB
85 Hz
SPL
Kurzzeitiger max. SPL Maximum short term sine wave SPL output averaged from 30 to 85 Hz, measured in half space at 1 meter.
≥103 dB
Eigenrauschen
Eigenrauschen Self generated noise level in half space at 1 m on axis (A-weighted).
≤5 dB SPL
Gewicht
Gewicht17.3 kg (38.1 lb)
Abmessungen
Höhe
410 mm
Breite
350 mm
Tiefe
319 mm
Gehäuse
Gehäusematerial
MDF
Gehäusetyp
Reflex port
Treiber
Treiber-Typ
Cone
Magnetically shielded driver.
Durchmesser
205 mm
Harmonische Verzerrung
Abschnitt Verstärker
Verstärker
130 W Class D
Netzspannung
100-240 VAC 50/60Hz
Stromverbrauch
ISS aktiv
≤0.5 W
Leerlauf
≤11 W
Volle Leistung
150 W
Abschnitt Signalverarbeitung
Anschlüsse
6 x Input 5 x input connectors XLR female, 10 kOhm balanced.
1 x LFE IN connector.
5 x Output XLR male output connectors.
Produktvarianten
Produktcodes
Weitere technische Details finden Sie in der Anleitung.
Schlüsseltechnologien

Aktive Frequenzweichen

Bass Management

Laminar Spiral Enclosure (LSE™)-Technology

Schutzschaltungen

Optimierte Verstärker

Kompensation von Raumeinflüssen
Aktive Frequenzweichen, die mit niedrigen Signalpegeln arbeiten.

Elektronische Frequenzweichen ermöglichen die Aufteilung des Audiosignals in einzelne Frequenzbänder, die separat an einzelne Leistungsverstärker geleitet werden können, die dann an spezifische, für ein bestimmtes Frequenzband optimierte Wandler angeschlossen werden.
Aktive Frequenzweichen gibt es sowohl in digitaler als auch in analoger Ausführung. Die digitalen aktiven Frequenzweichen von Genelec beinhalten zusätzliche Signalverarbeitung wie Schutzschaltungen, Verzögerung und Entzerrung.
Analoge aktive Frequenzweichen von Genelec enthalten elektronische Komponenten, die mit niedrigen Signalpegeln betrieben werden, die für die Eingänge von Leistungsverstärkern geeignet sind. Dies steht im Gegensatz zu passiven Frequenzweichen, die mit den hohen Signalpegeln der Endverstärkerausgänge arbeiten und dabei hohe Ströme und in einigen Fällen auch hohe Spannungen verarbeiten müssen.
In einem typischen 2-Wege-System benötigt die aktive Frequenzweiche zwei Leistungsverstärker - einen für den Tieftöner und einen für den Hochtöner.
Das Design der aktiven Frequenzweiche bietet mehrere Vorteile:
- Der Frequenzgang wird unabhängig von dynamischen Änderungen der elektrischen Eigenschaften des Treibers oder des Treiberpegels.
- Es besteht eine erhöhte Flexibilität und Präzision bei der Einstellung und Feinabstimmung jedes Ausgangsfrequenzgangs für die verwendeten Treiber.
- Jeder Treiber hat seine eigene Signalverarbeitung und seinen eigenen Leistungsverstärker. Dadurch wird jeder Treiber von den Treibersignalen der anderen Treiber isoliert, was Intermodulationsverzerrungen und Übersteuerungsprobleme reduziert.
- Empfindlichkeitsschwankungen zwischen den Treibern können kompensiert werden.
- Frequenz- und Phasenganganomalien, die mit den Eigenschaften eines Treibers innerhalb des vorgesehenen Durchlassbereichs verbunden sind, können kompensiert werden.
- Der neutrale Frequenzgang eines hochwertigen Aktivlautsprechers ist das Ergebnis der kombinierten Wirkung des Frequenzweichenfilters, des Leistungsverstärkers und der Treiber in einem Lautsprechergehäuse.
Die Verwendung des aktiven Ansatzes ermöglicht die Anpassung und Optimierung des Frequenzgangs des gesamten Lautsprechersystems in verschiedenen Raumumgebungen ohne teure externe Equalizer. Das Endergebnis ist ein einfacheres, zuverlässigeres, effizienteres, konsistenteres und präziseres aktives Lautsprechersystem.
Das Bass Management verarbeitet den Tiefbassanteil für mehrere Kanäle.

Das Prinzip des Bassmanagements besteht darin, dass Bassanteile von Audio-Kanälen nur von Lautsprechern wiedergegeben werden, die dazu in der Lage sind, unabhängig davon, ob es sich um die Hauptlautsprecher des Systems oder um einen oder mehrere Subwoofer handelt.
Bei der Stereowiedergabe sollten im Idealfall Signale von 20 Hz bis 20 kHz wiedergegeben werden. Große Mehrwege-Abhörsysteme können diesen großen Frequenzbereich abdecken. Bei Mehrkanalton sollten professionelle und Consumer-Audiosysteme ebenfalls in der Lage sein, Audiosignale bis in den Bassbereich für jeden Kanal wiederzugeben. Um dies zu erreichen, sollten Hauptmonitore, Subwoofer und Frequenzweichen-Elektronik zusammenarbeiten.
Ein Bassmanagementsystem verwendet entweder analoge elektronische Schaltkreise oder softwarebasierte Filter, die tieffrequente Informationen aus den Hauptkanälen filtern und an einen oder mehrere Subwoofer weiterleiten.
Der separate LFE (Low Frequency Effects)-Kanal kann auch über diesen oder diese Subwoofer abgehört werden und wird zu den tiefen Frequenzen der anderen Hauptkanäle hinzugefügt. Das grundlegende und wichtigste Ziel des Bassmanagements besteht also darin, sicherzustellen, dass die gesamte Audiobandbreite aller Kanäle bewertet werden kann.

Die Vorteile von Bass Management
- Der Subwoofer erweitert den Frequenzgang des Systems an der unteren Grenze des hörbaren Bereichs.
- Der Monitor kann einen höheren maximalen Schallpegel erzeugen, wenn er keine tiefen Frequenzen wiedergeben muss.
- Optimierte Tieftonwiedergabe durch Auswahl eines geeigneten Standorts für den Subwoofer; auch die Monitore können freier aufgestellt werden.
- Der Ausgang des Subwoofers ist in Pegel und Phase auf die Monitore abgestimmt, was eine neutrale und präzise Wiedergabe bis hinunter zu 19 Hz (je nach Modell sogar 15 Hz) und über den Crossover-Punkt ermöglicht.
- Der Ausgangspegel des LFE-Kanals (0 oder +10 dB im Vergleich zu den Hauptkanälen) kann an das Quellformat angepasst werden.
- Die Möglichkeit, den Subwoofer zu umgehen, erlaubt es, den hörbaren Einfluss des Subwoofers zu bewerten.
Das hocheffiziente Laminar Spiral-Gehäuse (LSE™) sorgt für eine präzise Wiedergabe von Bassfrequenzen.

Die Anforderungen an Subwoofer sind in den letzten Jahren so stark gestiegen, dass traditionelle Designkonzepte nicht mehr nutzbar sind. Um die bestmögliche Leistung zu erzielen, mussten bei Genelec mutige neue Ansätze verfolgt werden.
Auf der Grundlage jahrelanger akustischer Forschung und Kenntnisse nahmen die Genelec-Ingenieure die Herausforderungen an, die ihnen zu Beginn des 21. Jahrhunderts gestellt wurden. Die völlig einzigartige, geschwungene Form des Gehäuses der aktiven Subwoofer der LSE™-Serie ist das revolutionäre, patentierte Ergebnis ihrer Bemühungen.
Alle Subwoofer der Genelec LSE™-Serie verfügen über dieses innovative Laminar Spiral Enclosure™ (LSE™)-Bassreflexgehäuse. Es bietet hervorragende laminare Strömungseigenschaften mit minimalen Turbulenzgeräuschen und ermöglicht eine optimale Unterbringung eines sehr langen Reflexkanals auf kleinem Raum.

Die Erkenntnisse aus der LSE-Technologie werden auch bei der Konstruktion der Reflexöffnung unserer Aluminium-Gehäuse verwendet.
Das spiralförmige Design sorgt für eine extrem steife Gehäuseaußenseite und bildet gleichzeitig die integrierte Öffnung des Subwoofers. Die Tatsache, dass das eine Teil des anderen ist, bedeutet, dass der Luftstrom in und aus dem Gehäuseinneren durch die Öffnung völlig ungehindert fließen kann. Das Ergebnis ist ein außerordentlich präzises und reaktionsschnelles Tieftonsystem mit gemessenen Verzerrungswerten der zweiten und dritten Harmonischen, die in der Regel mehr als 30 dB unter dem Grundton liegen.

In Kombination mit aktiver Genelec Stereo- und Mehrkanal-Bassmanagement-Elektronik bieten die Subwoofer der LSE™-Serie ein unvergleichliches Tiefton-Hörerlebnis. Das Ergebnis ist eine Serie mit tadellosen technischen Leistungsdaten: sie ist einzigartig, funktional, und perfekt skalierbar - und unterscheidet sich von allen anderen Produkten auf dem Markt.
Hochentwickelte Schutzschaltungen für die Treiber garantieren einen sicheren Betrieb.
In kritischen Produktionsumgebungen ist es unerlässlich, dass Abhörsysteme jederzeit zuverlässig und voll funktionsfähig arbeiten. Einer der Hauptgründe für den großen Erfolg von Genelec in Rundfunk- und Fernsehumgebungen ist die Zuverlässigkeit unserer Produkte. Ein Schlüsselelement für diese Zuverlässigkeit ist die interne Schutzschaltung, die seit 1978 in allen Produkten enthalten ist.
Die Schutzschaltung verhindert Treiberausfälle, indem sie Signalpegel erkennt und bei plötzlichen Pegelspitzen oder konstant zu hohen Pegeln den Signalpegel automatisch absenkt. Natürlich beeinträchtigt diese Funktion in keiner Weise die Klangqualität der Lautsprecher, wenn sie innerhalb der Spezifikationen arbeiten, sondern verhindert nur, dass zu hohe Eingangssignale den Lautsprecher zerstören.
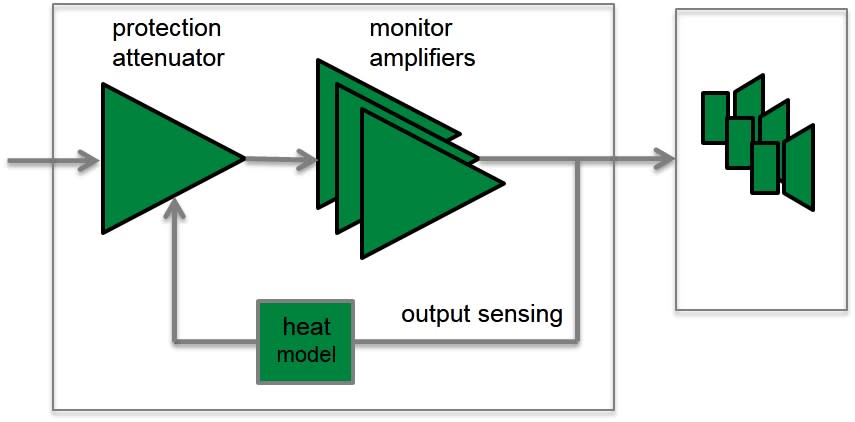
Merkmale und Vorteile der Schutzschaltungen:
- Reduziert den Ausgangspegel bei Bedarf (z. B. wenn die Temperatur der Schwingspule des Treibers den sicheren Grenzwert erreicht), was die Zuverlässigkeit des Systems erheblich verbessert
- Geeignete Schutzschaltungen in allen Lautsprechern und Subwoofern ermöglichen eine Maximierung des Systemausgangsschallpegels.
Jeder Treiber wird von einem eigenen, optimierten Verstärker angesteuert.

Elektronische Frequenzweichen ermöglichen es, das Audiosignal in einzelne Frequenzbänder aufzuteilen, die separat an einzelne Leistungsverstärker geleitet werden können, die dann an spezielle, für ein bestimmtes Frequenzband optimierte Schallwandler angeschlossen werden.
In einem typischen 2-Wege-Lautsprechersystem benötigt die aktive Frequenzweiche zwei Leistungsverstärker - einen für den Tieftöner und einen für den Hochtöner. Die Leistungsverstärker werden direkt an die Chassis eines Aktivlautsprechers angeschlossen, wodurch die Belastung des Leistungsverstärkers viel einfacher ermittelt werden kann. Jeder treiberspezifische Leistungsverstärker hat nur einen begrenzten Frequenzbereich zu verstärken (der Leistungsverstärker wird nach der aktiven Frequenzweiche platziert), was die Konstruktion noch einfacher macht.
Das Aktivprinzip bietet mehrere Vorteile:
- Die Leistungsverstärker sind direkt mit den Lautsprechertreibern verbunden, wodurch die Kontrolle durch die Dämpfung des Leistungsverstärkers auf die Schwingspule des Treibers maximiert und die Folgen dynamischer Änderungen der elektrischen Eigenschaften des Treibers verringert werden. Dies kann das Einschwingverhalten des Systems verbessern.
- Der Leistungsbedarf des Endverstärkers ist geringer. Da in den passiven Frequenzweichen-Filterkomponenten keine Energie verloren geht, wird die erforderliche Verstärkerleistung erheblich reduziert (in einigen Fällen um bis zu 50%), ohne dass die akustische Leistung des Lautsprechersystems verringert wird. Dadurch können Kosten gesenkt und die Audioqualität und Zuverlässigkeit des Systems erhöht werden.
- Kein Verlust zwischen Verstärker und Treibereinheiten führt zu einer maximalen akustischen Effizienz
- Mit aktiver Technologie kann eine überragende Klangleistung im Verhältnis zur Größe und zur Leistung bei niedrigen Frequenzen erzielt werden
- Alle Lautsprecher werden als werkseitig aufeinander abgestimmtes System geliefert (Verstärker, Frequenzweichen-Elektronik und Gehäuse-Treiber-Systeme)
Präzise Raumanpassung für optimale Wiedergabe im jeweiligen Abhörraum

Die Wechselwirkung zwischen Raumakustik und Lautsprecherabstrahlung ist komplex. Jeder Raum verändert den Frequenzgang des Monitors auf einzigartige Weise, z. B. stark reflektierende oder gedämpfte Räume oder die Aufstellung an einer Wand oder auf einem Stativ, das von den Wänden entfernt ist.
Alle Genelec-Lautsprechersysteme verfügen über eine Raumanpassung, um die Raumeinflüsse zu kompensieren und einen neutralen Frequenzgang an der Hörposition zu erhalten.
Analoge Systeme
Die analogen Lautsprechersysteme von Genelec bieten vielseitige DIP-Schalter zur Raumanpassung. Sie umfassen (je nach Modell):
- Bass Roll-Off und Bass Tilt
- Treble Tilt und Treble Roll-Off
- Bass Level
- Midrange Level
- Treble Level
- Desktop Control

Für tiefe Frequenzen gibt es zwei Haupt-Schalter. Der Bass-Tilt-Schalter, der als Shelving-Filter fungiert, und der Bass-Roll-Off-Schalter, mit dem Sie den tiefen und sehr tiefen Frequenzgang des Systems in verschiedenen Installationen optimieren können. Bei großen Systemen sind Bass-, Mittel- und Hochtonpegelregler vorhanden. Mit diesen Reglern lässt sich das relative Gleichgewicht zwischen den verschiedenen Frequenzbändern optimieren.
Die Betriebsanleitung und das Datenblatt jedes Lautsprechers enthalten eine Liste der empfohlenen Einstellungen für die Raumanpassung bei verschiedenen Installationen. Diese wurden auf der Grundlage langjähriger praktischer Erfahrungen und Messungen in verschiedenen typischen akustischen Umgebungen festgelegt.
Smart Active Monitor (SAM™) Systeme
Genelec SAM-Systeme bieten eine skalierbare, lösungsorientierte, intelligent vernetzte Auswahl an Modellen, die alle mit der Genelec Loudspeaker Manager (GLM™)-Software und dem automatischen Kalibrierungssystem AutoCal™ ausgestattet sind.
Genelec AutoCal bietet den branchenweit ersten integrierten Prozess für die vollständige automatische Messung, Analyse und Einstellung jedes Monitors im GLM-Kontrollnetzwerk. Das System misst den Frequenzgang an der Hörposition und setzt passende Kompensationsfilter im unteren und mittleren Frequenzbereich, um raumakustische Anomalien sowie die Unterschiede zwischen verschiedenen Hörpositionen zu minimieren. AutoCal gleicht auch die relativen Pegel, die Laufzeit und die korrekte Crossover-Phase (AutoPhase genannt) für alle Subwoofer im Netzwerk ab.

Der Acoustic Response Editor bietet eine genaue grafische Darstellung des gemessenen Frequenzgangs, der zur Kompensation genutzten Filter und des sich daraus ergebenden Systemfrequenzgangs für jeden Monitor und Subwoofer. Alle Einstellungen können zudem manuell angepasst werden.
Referenzen
Händler finden

Dokumentation
Dokumente
Operating Manual 7050C Quick Setup Guide 7050C Brochure 7050C Genelec Home Studio Audio Monitoring Guide (2023) Classic Active Monitoring Series Catalogue 2018 Genelec 7050C Operating Manual - Chinese Genelec Home Studio Audio Monitoring Guide (German version)FAQ
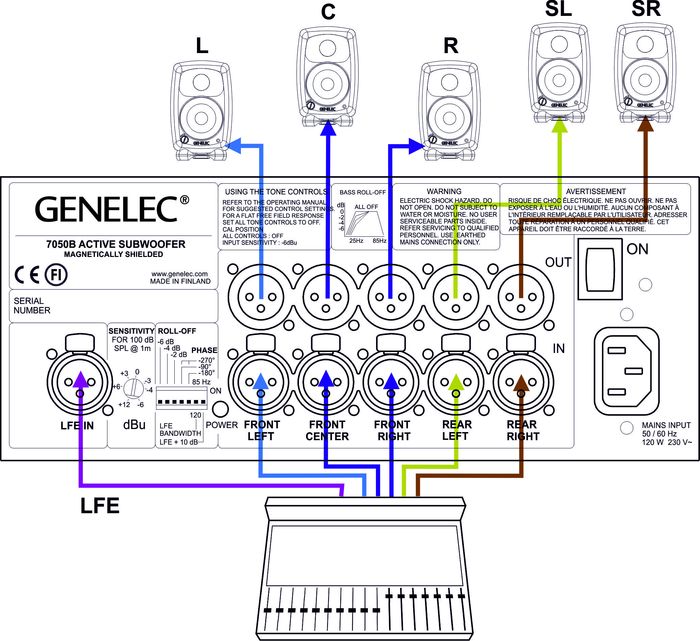
Connecting the 7050B Subwoofer
The 7050B subwoofer has balanced XLR IN/OUT connector pairs for five main channels and a dedicated LFE input connector for the LFE channel. Connect the signal cables from your source to the female XLR "IN" connectors on the lower connector row. Next connect XLR cables from the corresponding "OUT" male XLR connectors on the upper row to the input connectors of each 8020C monitor.
Turn the volume control knob on all 8020C’s monitors fully clockwise and switch the "Bass Roll-off" dip switch (switch 2) on all 8020C’s to "ON". This switch actuates an 85 Hz high-pass filter on the 8020C’s matching them to the main channel low-pass filter of the 7050B.
Alternatively you can connect to the 7050B a stereo pair of 8020C monitors by routing the signal cables from the source to the input connectors of the main monitors and an another pair of cables from the main monitors' output connectors to the "IN" connectors on the 7050B. In this configuration the volume controls on the main monitors affect the playback level of the 7050B too. The "Bass Roll-off" switch on the main monitors must also be switched to "ON" (switch 2).
Why to Align a Multichannel System?
The main goal in the alignment of a multichannel system is to set the subwoofer output level the same as the sound output level of the main monitor system. The LFE output of the mixing desk or decoder should be connected to the LFE input on the subwoofer.
For the 7050B, 7060B, 7070A, 7071A, 7073A products:
The LFE input has the same sensitivity as all other signal inputs unless the ‘LFE +10 dB’ DIP switch is ON. The switch is used when there is no +10 dB gain in the LFE channel output. The switch is set to 0 dB when there is already a +10 dB additional gain in the LFE channel output.
What reference level to use?
To ensure repeatable results in the finished product, the SMPTE (Society of Motion Pictures and Television) has set standard monitoring levels for cinema post-production work. The SMPTE reference level at the listening position is 85 dB SPL, on C weighted/slow scale. The input signal to the monitors is -20 dB FS (rms) full bandwidth pink noise. The SMPTE RP200 uses an electrical reference level of -18 dB FS.
For music mixes, there are no standardized levels. The level that the engineer chooses is arbitrary and based on personal taste, as is the level chosen by the end user. The level is typically 75 dB SPL for television audio work and 75-95 dB SPL for music production work.
Manual calibration of the level and frequency response
Monitors are first calibrated to have flat response at the listening position. This is achieved by doing the following:
Calibrate the monitor frequency responses using an acoustical measuring system with the subwoofer bypassed or disconnected. Then connect the Genelec subwoofer and adjust the subwoofer level, bass roll-off and phase so that the measured combined frequency response of the subwoofer and the monitor extends flat to the LF cut-off of the subwoofer, paying special attention to the subwoofer to monitor crossover point.
Alternative level calibration methods
If acoustic measurement system is not available for aligning the system, then follow the guidelines that can be found in the operating manual for adjusting the frequency response:
Level calibration using a ⅓ octave real time analyzer, broadband pink noise and an SPL meter
Connect the Genelec 5.1 system and play broadband pink noise signal (20 Hz – 20 kHz) through the subwoofer and one of the monitors, for example the centre channel monitor. Adjust the acoustic settings in the subwoofer and monitors so that the level in each band on the RTA analyser reads the same value. Then, set the output level of each channel to give the same acoustical level at the listening position.
Level calibration using filtered pink noise and an SPL Meter
You need to have filtered pink noise to calibrate the levels of the subwoofer and the main channels. You can use a copy of the TMH Corporation 'Multichannel Studio Test Tape' that includes the various test signals required.
Pink noise filtered to a passband 500 Hz to 2 kHz is used for adjusting the monitor levels, and between the frequency range 20 Hz to 80 Hz is used for calibrating the subwoofer level. Please note: If the standard recorded level of filtered pink noises is -18 dBFSrms for SMPTE RP200's (-20 dBFSrms for SMPTE) and then the absolute level calibration can be made so that the sound level meter reads a level 2 dB lower than specified for broadband pink noise. This is because there is less energy due to band limiting of the band-pass noise.
- Connect to monitors and play the 500 Hz to 2 kHz filtered pink noise. Set the SPL Meter to C-weighting and slow reading. Adjust each main channel individually to have the same SPL level at the listening position.
- Play 20 to 80 Hz filtered pink noise through the subwoofer. The correct adjustment gives a reading 3dB lower than the one for the monitors because the C weighting lowers the reading in the SPL meter at those frequencies. If there is no HP filter in the SPL meter then the reading should be the same as for the monitors.
hello
Haben Sie Fragen?
In unserem Support-Portal finden Sie Antworten auf häufig gestellte Fragen:
Hier können Sie unser Support-Team direkt kontaktieren.


